Drafting the Astrolabe: 3. The Protractor
- on 08.28.11
- Astrolabe Project, Drafting The Astrolabe
- Comments Off on Drafting the Astrolabe: 3. The Protractor
After Stoeffler
This does seem a bit extreme, but the purpose of this project is to see what can be done with just a straightedge and compass. Building my own protractor serves two purposes. One: It proves to me that an accurate tool can be made this way. Two: It gives me a chance to play with the tools and techniques I will need later on in the project.
Step 1: Using the straight edge, draw a horizontal line roughly 2/3 of the way down the paper.
Step 2: Use Method 1 to erect a perpendicular line at the center of the first line.
Step 3: Use the compass to draw four arcs as follows:
Set the point of the compass at the intersection of the two lines.
Set the width of the compass to the radius you wish for the protractor (bigger is more accurate).
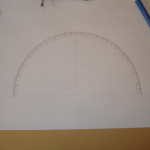
Draw a half-circle arc beginning and ending at the first line. This is the outside edge of the protractor.
Decrease the width of the compass a bit and draw second half-circle arc inside the first. The space between will be for degree increments.
Decrease the width of the compass a bit and draw third half-circle arc inside the second. The space between will be for 5 degree increments.
Decrease the width of the compass a bit and draw fourth half-circle arc inside the third. The space between will be for 10 degree increments.
Step 4: Trisect the right angles:
Work on one half of the protractor at a time.
Use Method 6 to trisect the right angle. This will give you lines at 30 and 60 degrees. Mark these across all four arcs.
Step 5: Bisect the 30 degree angles:
Work on one half of the protractor at a time.
Use Method 5 to bisect the 30 degree angles. This will give you lines at 15, 45 and 75 degrees. Mark these across the three outermost arcs.
Step 6: Trisect the 15 degree angles:
It is not possible to trisect a 15 degree angle by construction, therefore we have to fudge a bit.
Adjust the width of the compass until it can divide a 15 degree section of the outermost arc into three equal sections. Take your time and be as precise as possible.
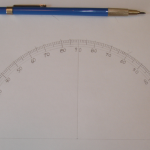
With the compass so set, mark the entire outer edge of the protractor. then use the straightedge to draw a line at each mark toward the center (Note some will be 5 degree lines and some 10, work it out…). This gives you a mark every 5 degrees.
Step 7: Mark the degrees
Now for the really tedious part. The compass is not going to be accurate enough to mark the degrees, so you will have to eyeball it.
On the outermost arc mark each 5 degree section into five 1 degree sections. Be as patient and accurate as possible.
Finally, label the scale as desired.
Congratulations, you have invented the protractor.
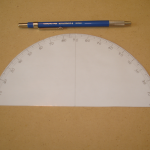
To finish mine I laminated the page in a 5 mil laminating envelope and carefully cut it out. It is now durable enough to use.


