HACKED!

I hate script-kiddies and their ilk.

A few days ago the site was hit with a PHP injection attack that had its pages redirecting visitors to malware infested sites.  I was on the site less that two days before I discovered this problem, so hopefully not too many people where afflicted.

I wiped the site down to bedrock and did a fresh install of WordPress. Hopefully that fixes the problem.

Apologies for any inconvenience caused.

Current Progress

Even though I haven’t been posting, I have been busy. In addition to the changes to the Astrolabe Generator mentioned in the previous post, I was asked to teach a class at a small gathering of medieval reenactors last month, and so had to to get my class handout updated ahead of schedule, and a large number of example astrolabes made. I over planned so I now have enough left-over handouts to cover one of my classes this summer (see below).

Because of work and other distractions, I’m falling behind on progress on the drafting project, I have five climate plates started, but most of the work on them remains. To finish the project I need to accomplish the following at minimum:

  • Draw the climate plates
  • Draw the rete
  • Draw the alidade and rule
  • Photocopy the finished pieces and assemble the astrolabe for testing
  • Run a series of tests of the various functions and compare accuracy with a computer generated model.
  • Write up the whole project and be ready to display by the first week of July.

That is a lot to accomplish in ten weeks of spare time; especially as I am committed to several other projects as well. To be sure that I can keep mostly on schedule, I’m going to finish the one climate plate I need for testing, and move on to the rest of the project. The remaining plates will be done as I have time.

As mentioned above I will be teaching again this year, at the annual Pennsic War. As usual, I am teaching two classes; one class will be during Peace Week and one during War Week. Tentative dates and times are below.

  • August 3, 1PM AS2
  • August 7, 1PM AS2

I will also be displaying the results of the “Drafting the Astrolabe” project at the Known World Arts and Sciences Display on Monday August 6th. Those of you attending Pennsic 41, please stop by and say hello.
Adding a Hemisphere

I’ve been lax on updating the blog lately. Not because I’ve not been interested, but because I’ve been busy.

First off: I have received two requests to modify the Astrolabe Generator to support the southern hemisphere. This took a bit of recoding and rearranging some of the functions, but the result is now up and running at http://astrolabeproject.com/build. Latitudes supported now run from 70 South to 70 North, with the exception of those latitudes within 1 degree of the equator. Those of you who want to make Southern Hemisphere astrolabes can now do so.

Latitudes less that 1 degree or greater than 70 degrees still cause problems with some of the calculations. For example, at 0 degrees latitude the horizon line is not a circle, but a straight line, and above 70 degrees some of the intersection code breaks for the unequal hours routines. I will work on this: The Equator problem should be simple, and the problems with 70 degrees plus will be an interesting programming exercise. I’ll keep you posted.

The Beauty of the Astrolabe

“The astrolabe is everything technology should aspire to be. It is beautiful. It is functional. It was, for its time, the very pinnacle of technological achievement, yet even today its simple effectiveness is striking.”

A lovely essay on the beauty of science, and belief.

The Beauty of the Astrolabe

Um, No Comment?


http://simpsonswiki.net/wiki/Personalized_Talking_Astrolabe

Drafting the Astrolabe 12: The climates part 1

Drawing the climate part 1The first step in drafting the astrolabe climate plate is to lay out the Tropics and the Equator, along with the meridian. As these markings will be the same for all the plates, it makes sense to draw each line on all the plates before moving on to the next line. This way, I can set the compass once for each line, and I only have to draw construction lines on a single sheet.
Step 1:
Draw a horizontal line to become the true east-west line; and erect a perpendicular line at its center point to become the meridian. Repeat this on all the climate sheets. Next, use the compass to draw a circle the desired diameter of the plate (remember to get this measurement from the finished astrolabe front drawing, the plate will need to fit in the mater hollow). Without changing the setting of the compass, repeat for all plates. Finally, set the compass to a slightly smaller diameter and draw the circle for the Tropic of Capricorn. Repeat on the other plates.
Note: The space being left at the edge of the plate allows room for the outer edge of the rete. Some astrolabes have this space some do not.
When done with this set all the plates should look like A in the figure to the right.
Step 2: 
The current obliquity (angle to the equator) of the Ecliptic is approximately 23 degrees 26 minutes [Morrison]. The next step is to project the circle for the Equator, so at an angle of 23.5 degrees (rounding off to the nearest half degree as my tools are no more accurate than that) I draw a light construction line from the center of the plate to the circle representing the Tropic of Capricorn (#1 on the right).
As I already have the Tropic of Capricorn defined, the first circle to project will be the Equator. To do this, place one end of the straightedge on the place where the true east-west line (the horizontal line) crosses the Tropic of Capricorn, and the other end on the point where the construction line intersects the same circle. Draw a second construction line (#2).  The point where this construction line crosses the meridian (the vertical line), marks the radius of the Equator circle. Place the point of the compass at the center and draw a circle at this point. Repeat this circle on the other plates.
Step 3:
Repeat this process to project the circle of the Tropic of Cancer: This time using the intersections with the Equator circle (See B on the figure to the right).
After the construction lines are removed, all five plates should look like C in the figure to the right.
The next step will be more complicated: Drawing the almucantars.

Drafting the Astrolabe 12: Planning the climates

Before I tackle the next bit I need to plan out what I want to do. I want a set of five climate plates, one for each of five different latitudes. One of these will need to be for the latitude of Cooper’s Lake, the site of the annual Pennsic War. Another should be the latitude of my home, of course. For the other three I will select from latitudes of Major cities I have visited.
This gives me the following list:
  • 39 degrees – My home latitude
  • 41 degrees – Pennsic War
  • 49 degrees – Paris
  • 52 degrees – London/Cambridge
  • 56 degrees – Copenhagen
As for drawing the plates themselves, it occurs to me that a lot of the work is going to be either identical or very similar for each plate. This suggests to me that doing all five plates at once, that is, completing each step on all five plates before moving on, will be the most efficient way forward.
The process for creating a climate plate breaks down as follows:
  1. Draw the outer edge of the plate. Add the Meridian and east-west line. Draw the Tropics and Equator.
  2. Draw the almucantars (circles of elevation) to include the horizon and the twilight line.
  3. Draw the azimuth arcs
  4. Draw the equal hour arcs
As I did with the front and back of the astrolabe I will detail each step as I go along.
Watch this space!

Drafting the Astrolabe 11: The Unequal Hour Arcs – Completed

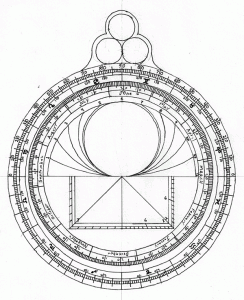
The unequal hours arcs have now been added to the back of the astrolabe. With the exception of what little decoration I’m planning, this completes work on the back of the project.

Unequal hours completed

Unequal hours completed

With the front and the back now finished, the next step is designing a set of climate plates. Doing five of those will get a bit tedious, perhaps, so I’ll probably take a break part-way through to do the rete and then the alidade and rule.

There’s an App for That: An astrolabe for the iPad

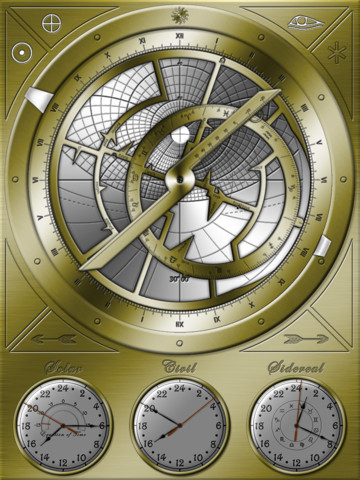
As I mentioned a while back, there is a developer out there using the output of the Astrolabe Generator to create an astrolabe app for the iPad. Well, version 1 is complete and available for free on the App Store. The website is: http://taucetisystems.com/. I have not had a chance to look at it yet, as I don’t have an iPad, but it looks very nice: Just the kind of thing I was hoping the Generator would inspire.

Phaeton for iPad

Phaeton for iPad

Bug Swatting and New Options

One of the Astrolabe Generator’s users, Jürgen Hoefeld, spotted a problem with the alignment of the Houses of Heaven, the intersection point should be on the horizon, and was not. I have it fixed now and the changes checked in to SourceForge. I have posted the updated generator to the site as well. In addition to the fix I have included two new options for the back, both still works in progress:

There is now an option to show the Lunar Mansions inside the Shadow Squares; and in the upper right quadrant drop-down there are options to display the Arcs of the Signs.