Drafting the Astrolabe 6: The Zodiac Scale
- on 11.07.11
- Astrolabe Project, Drafting The Astrolabe
- No Comments
OK, yes, that was tedious. But now it is done.
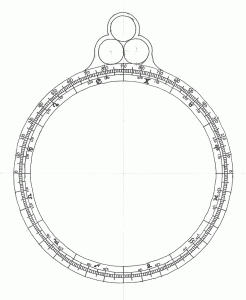
I have started work on the back of the astrolabe: The first scale, the zodiac ring, is finished.
Drawing this used a combination of geometric construction and fudging with the compass. First, draw the outside edge of the astrolabe (set the compass using the finished front drawing). When this is done draw 4 more circles of diminishing radius to make the scale. Then trisect the four quadrants. This divides the scale into the twelve astrological signs. Fudge with the compass to divide each sign into three parts, giving you the ten-degree marks. Then next, bisect the 10-degree angles to give the five-degree marks. Finally manually divide each five degree section into five one-degree ticks.
The scales should be marked as follows: The top half of the outermost ring should be marked 0-90 degrees on each side (zero for the horizontal and counting up to 90 for the vertical). This is the elevation scale, used to measure elevation above the horizon.
The innermost scale needs to be marked with the zodiac (I used the symbols, but spelling the names out is also used): Starting with Ares on the right side above the horizontal line and working counter-clockwise through the rest of the zodiac in order. Finally, each zodiac section has to have the 10 and 20 degree ticks marked (note that these are marked counter-clockwise as well).
Next up: Adding the Calendar.
